Today, many manufacturers are adding robotic painting systems to automate their painting applications. These robots operate autonomously, thanks to AI, in contrast to their manual predecessors, so switching to a robotic painting machine can be rather daunting due to their perceived complexities.
In this article, we’ll explain exactly how industrial painting robots work and, to round off, we’ll outline a few things you must consider if you want to successfully implement an industrial painting robot in your factory.
We’ll cover:
- What is robotic painting
- How does robotic painting work
- Types of painting robots
- What industries use robotic painting
- Benefits of robotic painting
- Industrial painting robots: Challenges
- Next steps
What is robotic painting?
Unfortunately for some of us, industrial painting robots aren’t the humanoid droids from Star Wars. In fact, most industrial painting robots are articulated robot arms — they appear and work very similarly to human arms.
Depending on the model, articulated arms have four to six joints (also called axes), allowing them to extend several feet, move in many directions, and rotate circuitously.
The combination of joints gives different industrial painting robot types impressive range and mobility. Moreover, their agility allows them to navigate complex geometries and successfully spray hard-to-reach areas.
Equipped with painting guns or spray heads (called end effectors) at the end of their arms, robotic painting systems flawlessly spray paint, primer, sealant, or any other type of coating your products might require.
Key stages in the robotic painting process
We’ve outlined the key stages of the robotic painting process below.
Next up, we’ll look at how this process works in more detail.
How does robotic painting work?
These robots move at a faster clip (sometimes 30x faster) and produce more consistent results than human painters or traditional painting machines can.
Robot painting machines are compatible with manufacturing settings, as you can integrate them into almost any part of your manufacturing operation.
Let’s take a look at the key behind-the-scenes players:
Sophisticated optical sensors
Robot painters’ spray heads (for spray painting robots) contain optics systems, allowing them to “see” what they’re spraying in real time. These optical sensors can easily detect dents, scratches, and other imperfections, often more accurately and precisely than human operators. When the sensors detect defects, they can immediately inform human operators to pull the piece from the line.
The optical sensors also determine when the robotic spray painting arm has applied the proper sealant, paint, or coating to each product. A painting robot’s ability to correctly discern applied volume nearly eliminates overspray, saving on product spend.
Inside most industrial painting robots, a bundle of sensors usually monitors product volume, flow rate, pressure, and viscosity. These high-tech sensors can ensure an even and consistent spray, surpassing the ability of humans or traditional painting machinery.
If you’re worried about those optical sensors quickly being rendered useless, don’t stress. You’ll be glad to know that many industrial painting robots come equipped with a purge system that shields optical sensors with a protective gas barrier (typically air or nitrogen) when the nozzle is painting. It works a little like swimming goggles over human eyes in a chlorinated pool.
Example: ABB’s spray paint atomizer ups efficiency by 10%.
Spraying mechanics
Industrial robot painters’ sophisticated heads can draw different fluids from multiple tanks. A single robotic painter can spray an object with several layers using different products for each layer.
For example, a single industrial painting robot can apply an anti-rust base layer, a chip-resistant coating, color, and a finishing seal. Industrial painting robots eliminate the downtime caused by cleaning and filling the old manual or human-operated systems.
Before the robot sprays on each coating, it transforms the liquid into a gas in an atomization state change. Most robot painters use one of the three following methods:
Air atomization:
- How it works: The robot applies air into the liquid, breaking it into smaller droplets.
- Advantages: The cheapest atomizer, high durability.
- Disadvantages: Not all applications may work with air atomization. The resulting spray is less consistent than the other atomization types. Droplets range from 10 to 100 microns, depending on the robotic painting system.
Electrostatic atomization:
- How it works: A high-voltage bolt of DC electricity zaps the liquid, shattering it into a mist.
- Advantages: Efficiently breaks down liquids and negatively charges the resulting gas, making it a go-to option for applications that must adhere to positively charged surfaces. Minimal overspray as droplets produced electrostatically average around an exquisitely fine 1 micron.
- Disadvantages: Complex design, may require extra programming, and be expensive.
Ultrasonic atomization:
- How it works: The robot blasts the liquid with a high-frequency sound wave, creating mist.
- Advantages: Produces fine spray patterns with droplets around 1–5 microns, resulting in little to negligible overspray.
- Disadvantages: Complex design, may require extra programming, and be expensive.
All atomization processes result in lower volatile organic compound emissions (VOCs). Lower VOC emissions create a safer environment for the painting robot’s human coworkers.
Atomized paints and sealants tend to finish more durably than liquid ones, adding strength to the end application and drying much faster.
However, which atomization system you choose will ultimately depend on the following:
- The product you’re spraying
- The liquid consistency before it’s transformed into droplets
- Your end effector’s nozzle
- The surface to which the droplets will stick.
Types of painting robots
Painting robots come in several configurations, and each one is suited to specific manufacturing needs.
Here are the main types of painting robots:
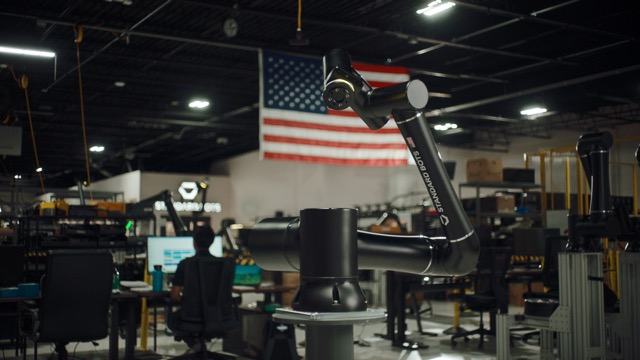
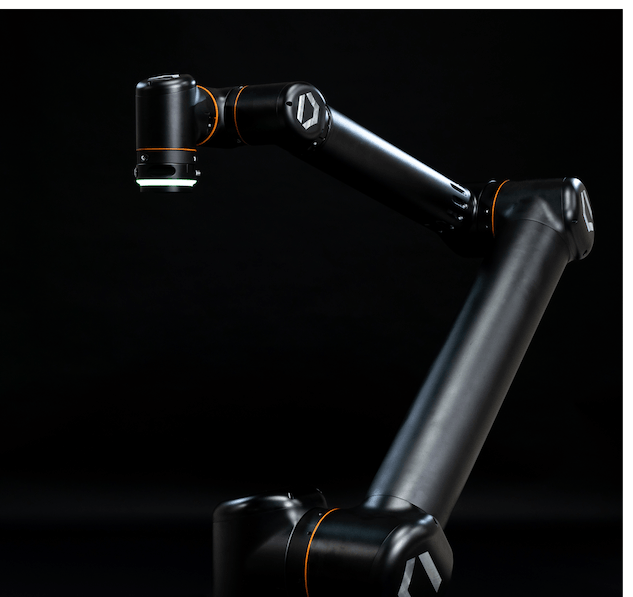
- Six-axis articulated arms: These robots, like the RO1 by Standard Bots, feature six joints, providing exceptional flexibility and a wide range of motion. This design allows them to navigate complex shapes, apply coatings to hard-to-reach areas, and handle tasks like spraying multiple layers with precision.
- Four-axis robots: With four joints, these robots offer solid performance for simpler painting jobs. They are very good in linear movements and are often used for flat or gently curved surfaces, making them cost-effective for simpler applications.
- SCARA robots: Selective Compliance Articulated Robot Arms (SCARA) are designed for high-speed, repetitive jobs. With four axes, they’re ideal for painting small, precise components, such as electronics or appliance parts, though their range is more limited.
What industries use robotic painting?
Industrial painting robots will be a solid fit in most applications because of their multiple-axis structure and end effector versatility.
Here are the main players harnessing the power of these robots:
Automotive
Car manufacturers worldwide use robots to color their products and add base primers, sealants, and chip-resistant coating. Multiple-axis arm robots flawlessly spray sealants and coatings to difficult-to-reach, angular locations.
Aerospace
All kinds of high-tech machinery, from commercial airplanes to Mars-bound rovers, require specialized coating to ensure they thrive in extreme environments. Industrial painting robots are a staple tool in the aerospace industry because they deliver consistent results, keeping products safe from harsh environments — on Earth and beyond.
Electronics and home appliances
Gadgets and appliances we use daily, like smartphones, refrigerators, TVs, and computers, were most likely painted, coated, and sealed by a painting robot — these robots are everywhere in electronics.
A painting robot may have sprayed a layer of water-resistant, dust-proof sealant on your new iPhone and a coating for semiconductors and wires inside the phone.
These industries are just a tiny fraction of those harnessing industrial painting robots' efficiency. Heavy industry component makers, furniture manufacturers, shipping container builders, and countless others also utilize industrial painting robots for their applications.
Paint shop robots pros & cons
Before we dive into the technical details, we’ve summarized the key pros and cons of robotic painting.
Now, let’s examine these benefits and challenges in greater detail.
Benefits of robotic painting systems
Adding an industrial painting robot to your operation delivers measurable improvements that can transform your production line.
Here’s why these systems are worth the investment:
- Superior consistency and quality: With precise sensors and controlled spraying, robots deliver uniform coats every time, reducing defects and ensuring a professional finish that outshines manual methods.
- Significant cost savings: By minimizing overspray and optimizing paint usage, robots cut down on material waste, while their 24/7 operation majorly increases output without the need for extra labor.
- Much-improved workplace safety: Lower VOC emissions and automated processes reduce health risks for workers, creating a safer environment with less exposure to harmful fumes. It’s also much more sustainable.
- A major boost to overall production speed: Robots work much faster than humans, applying multiple layers in one go without downtime, so you can get more done in less time.
Robo painting machine: Challenges and how to integrate
Implementing an industrial painting robot is an endeavor that requires careful planning.
You’ll want to note these key considerations:
Budget
The potential amount of money to invest in a painting robot is usually the most crucial consideration to most factory owners. Industrial painting robots range from $50,000 to $100,000 or more, depending on the following:
- The robot arm brand
- The number of axes within the robot
- The sophistication levels of the optical sensor and end-effector
- The atomization type
- Programming costs
These factors can accrue to a substantial investment: Consider the total cost of ownership (TCO) and how long it will take to get a return on your investment (ROI). Positive ROI factors include the obvious increase in productivity and output, the savings in wasted paint, and reduced product defects.
Placement, auxiliary features, and maintenance
What size is your application, and how much paint is needed to cover it? The answer to this question will help you determine the best location inside your factory for the robot to do its work.
Where you put the robot depends on what stage of the production process requires it. While placing a robot on the floor consumes considerable space, you can easily enclose it with a protective ventilation booth with a ventilation system. This protective equipment removes fumes that may harm workers and effectively filters out anything that could damage the environment.
Mounting a painting robot on walls or ceilings saves a lot of space: Still, it requires human coworkers to exercise greater caution and may require additional safety equipment to be purchased and installed. You’ll need to determine if you require a particular fixture to hold the object being painted.
There are robots available on the market that specialize in this, but you can also use more straightforward mechanical methods or have your human staff manually affix items for the robot to work on.
Finally, industrial painting robots require maintenance. Their nozzles and hoses will need cleaning, their sensors will need calibrating, and their software will occasionally update. You’ll want to factor the downtime required for routine maintenance tasks into your TCO and ROI calculations.
Human compatibility
In most cases, humans work alongside industrial painting robots. So, you’ll want to ensure you have safety procedures and equipment to keep your team safe when collaborating with their non-carbon-based (cobot) colleagues.
Safety measures might include: Placing emergency-stop buttons outside the robot’s range of motion (a work envelope in robotics), training employees to be aware of the dangers of mist, and correctly using personal protective equipment (PPE). Your chosen robot manufacturer will provide operational instructions to those working directly with industrial painting robots.
Summing up
Industrial painting robots offer a powerful solution for modern manufacturing, bringing precision and efficiency to a wide range of applications.
With the right planning, a painting robot can absolutely elevate your production line and keep you ahead in a competitive market.
Next steps
Interested in bringing robotic painting to your own business? RO1 by Standard Bots is a great choice for factories both large and small:
- Affordable: RO1 is the most affordable robotic arm in its class, starting at almost half the price of incumbent competitors.
- Powerful: RO1 is faster and more precise than competitors despite having the highest payload capacity in its class at 18 kg.
- Integrated: RO1 comes equipped with universal M8 4- and 8-pin connectors, ready to plug and play with almost any paint applicator on the market.
- Easy to set up: With its AI on par with GPT-4 and its no-code framework, RO1 is easy to set up and redeploy, even for non-techies.
- Safe and sound: RO1 can collaborate safely with human workers, even for highly technical painting operations.
Speak to our solutions team today to organize a free, 30-day onsite trial and get expert advice on everything you need to deploy your first robot.
brighter future

Join thousands of creators
receiving our weekly articles.