Automating CNC machine loading with a robot can be a game-changing move for your manufacturing or warehousing operation. However, the process involves more than just putting a robot next to a CNC machine and pressing "Start." From selecting the right robot and accessories to programming, safety measures, and ongoing maintenance, there's a lot to consider.
Although specific steps may differ per manufacturer, this guide aims to be your one-stop shop for setting up a robot to load a CNC machine. Whether you're new to automation or looking to refine your existing setup, we'll walk you through every crucial step. Expect practical, how-to advice that you can implement right away, all aimed at maximizing efficiency and safety in your operations.
Step 1: Gather data to help you choose a robot
The first thing you need to do is gather data on the types of materials you will be handling, the volume and loading frequency, and the specs of your CNC machine. You’ll want to compile all this information into a single document. This will be your reference when selecting a robot and setting up the loading process.
Here is a comprehensive checklist of things to note when gathering your data:
- Make an inventory of the types of materials you'll be loading into the CNC machine. This could range from metal billets to plastic blocks.
- Measure the weight and dimensions of these materials. You'll need this information to select the appropriate robot and end-of-arm tooling later on.
- Consider how these materials will be supplied to the robot. Will they come from a conveyor, a pallet, or some other means? This impacts the robot's reach and mobility requirements.
- How many pieces do you need to load per hour or shift? This helps you figure out the speed your robot needs to operate.
- How often will the CNC machine need new material? This could range from multiple times per hour to a few times per day. This impacts the robot's duty cycle and your workflow design.
- List down the specifications of your CNC machine, including its model, loading area dimensions, and interface capabilities.
- Robots and CNC machines need to communicate seamlessly. Ensure that your CNC machine’s control system is compatible with the types of robots you are considering.
- Measure the space around your CNC machine. You need to know how much room you have for the robot, as this affects the type of robot you can accommodate (e.g. a Six-Axis robot may need more room than a SCARA robot).
- Make sure your workspace has the electrical capacity to power both the CNC machine and the robot. This may require consulting with an electrician to confirm you have the right power outlets and voltage.
Note: For more info on choosing the perfect robot for your CNC tending needs, check out our buyer's guide.
Step 2: Set up and test your robot
Now that you have your robot, the next step is to set it up and connect it with your CNC machine. Not all robot manufacturers provide free set up and assembling, some will require an additional set-up fee.
If you have to do the setup yourself, follow these steps:
- Open up the robot packaging and ensure all parts are present and in good condition. Check for the arm, base, any end-of-arm tooling (EOAT), and connecting cables.
- Position the robot's base at the designated area near your CNC machine. Make sure it's leveled and securely fastened to the ground to avoid any movement during operation.
- Follow the manufacturer's guide to attach the robotic arm to the base. Typically, this involves bolting the arm onto the base and making sure it's properly aligned.
- Attach the selected gripper or other end-of-arm tooling to the robot arm. Make sure it's tightly secured, as this is the part that will be handling your material.
- Properly route and secure all electrical and pneumatic cables from the robot to avoid any interference or safety hazards.
After assembling your robot, you need to connect it to its control system. Identify the robot's control interface, which may be built-in or a separate unit. Then, connect the robot's arm and EOAT to the controller using the appropriate cables. Plug in the controller and the robot to your power source. Turn them on and make sure there are no error messages on startup.
There is usually a pre-programmed initial test routine in the manufacturer’s guide that you can perform to ensure the arm and EOAT are functioning as expected. Place a test material into the working zone where the robot will pick it up.
Manually control the robot to pick up the test material and move it to the CNC machine's loading area. This ensures the mechanical setup is sound. If the robot has difficulty reaching or picking up the test material, make necessary adjustments to the robot's position or EOAT.
Step 3: Prepare the CNC machine
Once your robot is set up, it's time to turn your attention to the CNC machine. This will involve clearing the workspace and aligning the machine with the robot's area of operation. Here's how to go about it:
- Make sure there are no objects in the way that could interfere with the robot's movement or the CNC machine's operation.
- Wipe down the loading area on the CNC machine where the material will be placed. Any debris could affect the machining process.
- Load up the CNC program corresponding to the material and operation you'll be running. This is usually done via the machine's interface.
- Define the machine's zero point (or origin), which is the reference point from where all the machining operations will be performed.
- Install any necessary cutting tools, drills, or mills into the CNC machine and make sure they are calibrated.
- Perform a no-material test run to make sure the machine settings are correct.
Step 4: Program the robot
Getting your robot to pickup material and place it into a CNC machine isn't as simple as pressing a "go" button. It requires a sequence of specific movements and actions, all of which need to be programmed. If you are not familiar with the programming, get an expert to set it up.
Programming the robot typically involves scripting the robot’s movements and defining key points in the loading sequence. Here are the basic steps involved:
- Open the programming software that comes with your robot. This is where you or the programmer will be inputting all the commands.
- Define the 'home' or 'rest' position for the robot. This is where the robot will return to after each loading cycle.
- Input the pick up coordinates, this is where the robot will pick up the material. Make sure to specify the approach angle and speed.
- Similarly, input the drop-off point coordinates inside the CNC machine where the material needs to be placed.
- Define a 'buffer zone' around the CNC machine's loading area. This is a safety margin to ensure the robot doesn’t collide with the machine.
- Program the robot to communicate with CNC machine door when it needs to put a part in.
- Program the end-of-arm tooling to grip the material securely during pickup and release it gently during drop-off.
- Input the transitional movements, such as lifting the material and rotating the arm, to move from the pickup point to the drop-off point.
- Add contingencies for what the robot should do if it encounters an issue like a failed pickup or drop-off.
Note: There can be additional steps in between depending on the specific robot or setup.
After you are done programming the robot, run a dry test with the robot to ensure it moves according to the programmed sequences. Observe the robot's movement speeds during pickup and drop-off. Adjust as needed to find the optimal balance between speed and safety.
Make any necessary adjustments to the coordinates, angles, or tooling settings to ensure precise movement and operation. Run another series of dry tests to confirm that your adjustments have been effective. If satisfied, save the programmed sequence.
Step 5: Sync the robot with your CNC machine
It's not enough for a robot and CNC machine to just operate near each other; they need to 'talk' to one another to coordinate actions. This involves a mix of hardware connections and software configurations. Here is how you can approach the synchronization:
For your hardware connections:
- Determine the available communication ports on both the CNC machine and the robot controller. This is typically either Ethernet or a set of direct relays
- Connect the robot controller to the CNC machine using the appropriate cable. Ensure the connection is secure to avoid any disconnection issues. Once connected, restart both systems to initialize the new hardware settings.
For your software configuration:
- Navigate to the control software for your CNC machine and your robot. You may have to open two separate software interfaces, depending on your setup.
- Select the communication protocol that both systems will use. This could be something like Modbus, Ethernet/IP, or another industry-standard protocol.
- If you are using digital I/O, map the input and output points between the CNC machine and the robot. This tells each system what signal to expect and what action it triggers.
When you have the hardware and software set up, send a test signal from the robot controller to the CNC machine to confirm that the connection is operational. The CNC machine should acknowledge the signal. This confirms that the hardware and software are both set up correctly.
Run a brief sequence where the robot picks up material, the CNC machine acknowledges receipt, and the robot returns to the home position. If any part of the sync test fails, check error logs on both the robot controller and the CNC machine for clues. Refer to the manuals for both systems to troubleshoot common issues related to syncing and communication.
Note: It’s best to have the robot manufacturers handle the setup and synchronization with your CNC machine.
Step 6: Run a live test and monitor it
Finally, everything is ready and it’s time to see how everything works together. The purpose of live testing is to validate that your entire setup — the robot, CNC machine, and their coordinated actions — operates as expected under real-world conditions. It also allows you to make any last-minute adjustments before full-scale operation.
When preparing for a live test, ensure all safety measures are in place. This includes barricades or safety cages around the operational area, as well as ensuring all staff are aware that testing is about to begin.
Place the material to be machined in the robot's pickup zone and make sure the CNC machine is in standby mode, and ready to receive the material.
To conduct the live test, initiate the robot's programmed sequence. It should pick up the material, move it to the CNC machine, and place it in the specified location. Watch to see if the CNC machine acknowledges the loaded material and begins its machining process.
After the CNC machine has finished, the robot should remove the material and return to its home position. Check the data logs on both the robot controller and CNC machine for any errors or delays in the process. Note any issues during the live test, such as missed pickups, alignment problems, or communication delays.
Based on the issues identified, make necessary adjustments to the robot's program, CNC machine settings, or physical alignment. Conduct another live test to validate that the adjustments have solved the issues.
Conclusion
At this point, you've meticulously planned, installed, programmed, and safety-proofed your robotic CNC loading system. But the work doesn't stop here; keeping this system running smoothly requires ongoing attention and occasional tweaks.
Regularly update the software for both the robot and CNC machine to benefit from new features or security patches. Evaluate key performance indicators to assess the efficiency and productivity of your automated system. Perform a quarterly safety audit to reassess and update safety measures as needed.\
Next steps
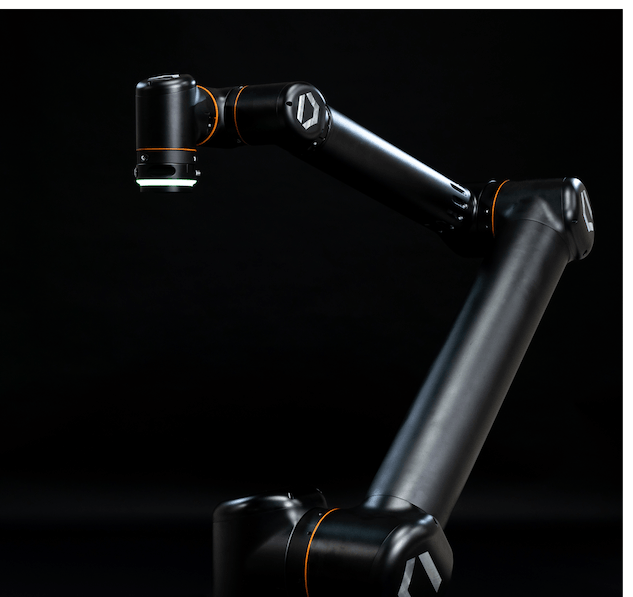
If you need a robot that is affordable, easy to set up, and not unnecessarily complicated, then you should consider RO1 by Standard Bots to help you load your CNC machine:
- Its touchscreen interface opens up automation to everyone, with simple visual programming that involves zero code. It’s like operating your smartphone.
- The Standard Bots team will come on-site to understand your work environment and set up RO1 to perform the tasks you need it to.
- On top of being the most affordable option on the market, RO1 has subscription-based pricing, meaning you can cancel your subscription at any time without penalty.
Speak to the team today for a free, custom-engineered analysis.
brighter future

Join thousands of creators
receiving our weekly articles.